Bought presets are useful, but the presets you build yourself are the ones you end up using every week. They match your camera, your light and your taste. The good news is that saving one takes under a minute. The part that takes thought is deciding which settings go into it, and that is where most homemade presets go wrong.
This guide shows you how to create a Lightroom preset in Lightroom Classic, Lightroom desktop and Lightroom mobile, which settings to include or leave out, and how to keep a growing collection organized.
Quick answer: Edit a typical photo until you like the look, then save it as a preset. In Lightroom Classic, click the + on the Presets panel and choose Create Preset. In Lightroom desktop and mobile, open Presets, tap the three-dot menu and choose Create Preset. Name it, pick a group, untick white balance and exposure, and save.
On this page
- Start with the right photo
- Build the look in a sensible order
- How to create a Lightroom preset in Lightroom Classic
- How to create a preset in Lightroom desktop and mobile
- Which settings to include (and which to leave out)
- Organize your presets so you can find them
- Test before you trust it
- Back up and share your presets
- Your next edit
- FAQ
Start with the right photo
A preset carries the edit from one photo to many, so the photo you build it on matters. Pick something typical of what you shoot, not your hardest or most unusual image.
- Well exposed: no large blown highlights or crushed shadows. If the base photo needed +2 Exposure to look right, that correction will wreck every other photo.
- Neutral light: daylight or open shade is easier than mixed tungsten and window light.
- Raw if possible: raw files respond to edits more predictably. Our post on RAW vs JPEG for presets explains why.
- Varied colors: a frame with some skin, sky and green gives you a better test of how the color changes behave.
Build the look in a sensible order
Edit globally, and work roughly from the top of the panels down. In Lightroom Classic that means the Basic panel, then Tone Curve, HSL/Color, Color Grading, Detail and Effects. In Lightroom desktop and mobile, it means Light, Color, Effects and Detail.
- Choose a profile. Adobe Color is a safe default; Adobe Portrait is softer on skin. The profile sets the starting colors for everything else.
- Set the tone. Contrast, Highlights, Shadows, Whites and Blacks shape the mood. Keep Exposure for the end, since you will not save it.
- Shape the curve. A small lift of the black point (for example, input 0 to output 20) gives a soft, matte finish.
- Adjust colors. Use the HSL/Color Mixer for specific hues and Color Grading for overall tints in shadows, midtones and highlights.
- Finish with effects. Add a light vignette or grain if the look needs it.
Avoid masks and spot healing at this stage. Masks drawn by hand fit one photo only, and spot removal is not saved in presets at all.
How to create a Lightroom preset in Lightroom Classic
- In the Develop module, with your edited photo selected, click the + icon on the Presets panel header and choose Create Preset. You can also use Develop > New Preset or the shortcut Ctrl+Shift+N (Windows) or Cmd+Shift+N (Mac).
- Type a Preset Name.
- Choose a Group from the dropdown, or pick New Group to create one.
- Tick or untick the settings to include (see the next section). Use Check None first if you want to build the list from scratch.
- Click Create. The preset appears in the chosen group in the Presets panel.
How to create a preset in Lightroom desktop and mobile
Lightroom desktop: open the Edit panel, click the Presets button near the bottom, then click the three-dot menu at the top of the Presets panel and choose Create Preset. Name it, choose a group and pick the settings to include, then click Save.
Lightroom mobile: open your edited photo, tap the three-dot menu in the top right and choose Create Preset. The settings are grouped by panel (Light, Color, Effects, Detail, Optics, Geometry), and you can expand each group to tick individual items. Tap the checkmark to save.
Presets created in Lightroom desktop or mobile sync to your other devices when you are signed in with the same Adobe account. The exact layout of the dialog differs slightly between versions, but the choices are the same.
Which settings to include (and which to leave out)
This is the decision that separates a preset you use daily from one that breaks on every new photo. The rule of thumb: include settings that define the style, leave out settings that correct the individual photo.
| Setting | Include? | Why |
|---|---|---|
| Profile | Yes | The look was built on top of it; a different profile shifts every color. |
| White Balance | Usually no | Every scene’s light is different. Set it per photo. |
| Exposure | No | Brightness is a per-photo correction, not a style. |
| Contrast, Highlights, Shadows, Whites, Blacks | Usually yes | These shape the mood. Leave out Highlights or Whites if your photos vary a lot. |
| Texture, Clarity, Dehaze | Yes, if used | Part of the character of the look. |
| Vibrance, Saturation | Yes | Core to the color style. |
| Tone Curve | Yes | Often the heart of the preset, especially for faded or matte looks. |
| HSL / Color Mixer | Yes | Defines how greens, blues and skin tones render. |
| Color Grading | Yes | The tint in shadows and highlights is pure style. |
| Sharpening, Noise Reduction | Usually no | These depend on camera, ISO and output size. |
| Lens Corrections | Optional | Enable Profile Corrections is safe; manual distortion is not. |
| Transform | No | Perspective fixes belong to one photo. |
| Effects (vignette, grain) | Yes, if used | Part of the finish. |
| Process Version | Yes | Keeps sliders behaving the same as when you built it (Classic shows this option). |
| Calibration | Yes, if used | A common trick for film-like color. |
| Masking | Only AI masks | Recent versions can include masks. Select Subject or Select Sky masks recalculate for each photo; hand-drawn brushes do not. |
Key takeaway: An unticked setting is left alone when you apply the preset. That is exactly why you untick white balance and exposure: the preset changes the style while your per-photo corrections stay put.
One subtle trap: if you untick a setting, applying the preset will not reset it. So if Photo A has Clarity +40 and your preset does not include Clarity, the +40 stays. When you want a preset to fully define a value, even at zero, include it.
Organize your presets so you can find them
Ten presets are easy to manage. Sixty are not. A little structure early saves a lot of scrolling later.
Use groups by purpose
Group by what the preset does rather than when you made it. A layout we like: “My Looks” for complete styles, “My Tools” for one-job presets (a matte curve, a grain finish, a skin fix), and a group per client or project if you shoot for others.
Name presets for sorting
Lightroom sorts alphabetically, so prefix names with numbers or a shared word: “01 Warm Base”, “02 Warm Matte”, “03 Warm Punchy”. Variations of the same look then sit together in the list.
Move, rename, update and hide
- Move: in Classic, drag a preset from one group into another. In Lightroom desktop and mobile, use the preset’s right-click or three-dot options, where a Move option is available in recent versions.
- Rename: right-click (or long-press on mobile) and choose Rename.
- Update: after tweaking an edit, right-click the preset in Classic and choose Update with Current Settings. Recent versions of Lightroom desktop offer a similar Update option.
- Hide: in Classic, open the + menu and choose Manage Presets to untick groups you rarely use, such as Adobe’s built-in ones. They are hidden, not deleted.
Test before you trust it
Apply your new preset to ten photos from different shoots: bright, dim, indoor, outdoor, people, landscape. Watch for repeated problems. If skin turns orange on every portrait, the Orange saturation is too high. If shadows go muddy on dim shots, the Blacks or curve lift is too strong.
Fix the base edit, then use Update with Current Settings so the preset improves rather than multiplying into “Warm v2 final FINAL”. If you plan to apply the preset to whole shoots at once, our guide to batch editing in Lightroom shows the fastest ways to do it.
Back up and share your presets
In Classic, right-click a preset and choose Export to save it as an .xmp file. Recent versions also offer Export Group on a group to save the whole set as a zip. Anyone can import those files in Classic, Lightroom desktop or mobile, using the steps in our preset install guide.
Presets made in Lightroom desktop and mobile are stored in your Adobe cloud account, which acts as a backup while your subscription is active. It is still smart to keep exported .xmp copies on your own drive.
Your next edit
Build one preset this week from a photo you already love, save it without white balance and exposure, and test it on ten images. Once that feels reliable, start a second, simpler one that only does a single job. If you are still unsure where presets end and profiles begin, read Lightroom presets vs profiles next.
FAQ
Can a Lightroom preset include a crop?
No. Crop and spot removal are not included in Develop presets. If you need the same crop on many photos, copy and paste settings or use Sync with Crop ticked.
Should I include white balance in my preset?
Usually not. Lighting changes from photo to photo, so a fixed white balance will look wrong more often than right. The exception is a preset built for one consistent setup, like a studio with the same lights every time.
Where are my own presets saved?
Lightroom Classic stores user presets as .xmp files in the CameraRaw Settings folder, unless Store presets with this catalog is turned on in Preferences. Lightroom desktop and mobile store them in your Adobe cloud account and sync them.
Can I edit a preset after creating it?
Yes. Apply it to a photo, change the sliders, then right-click the preset and choose Update with Current Settings in Classic. Recent versions of Lightroom desktop offer an Update option in the preset’s menu as well.
Keep reading
Lightroom Presets vs Profiles: What’s the Difference?
Profiles set how Lightroom renders your photo; presets move the sliders. Here is how they differ and how to use them together.
Lightroom Remove Tool Guide: Heal, Clone and Generative AI
Content-Aware Remove, Heal, Clone or Generative Remove? Which mode to pick, the settings that matter, and fixing dust fast.
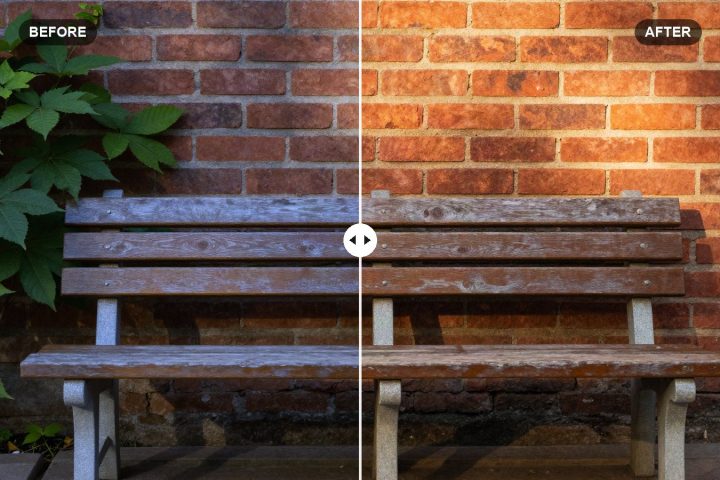
Lightroom White Balance Guide: Temp, Tint and Eyedropper
Fix color casts for good: Temp and Tint, the eyedropper, As Shot vs Auto, RAW vs JPEG, and masks for mixed light.