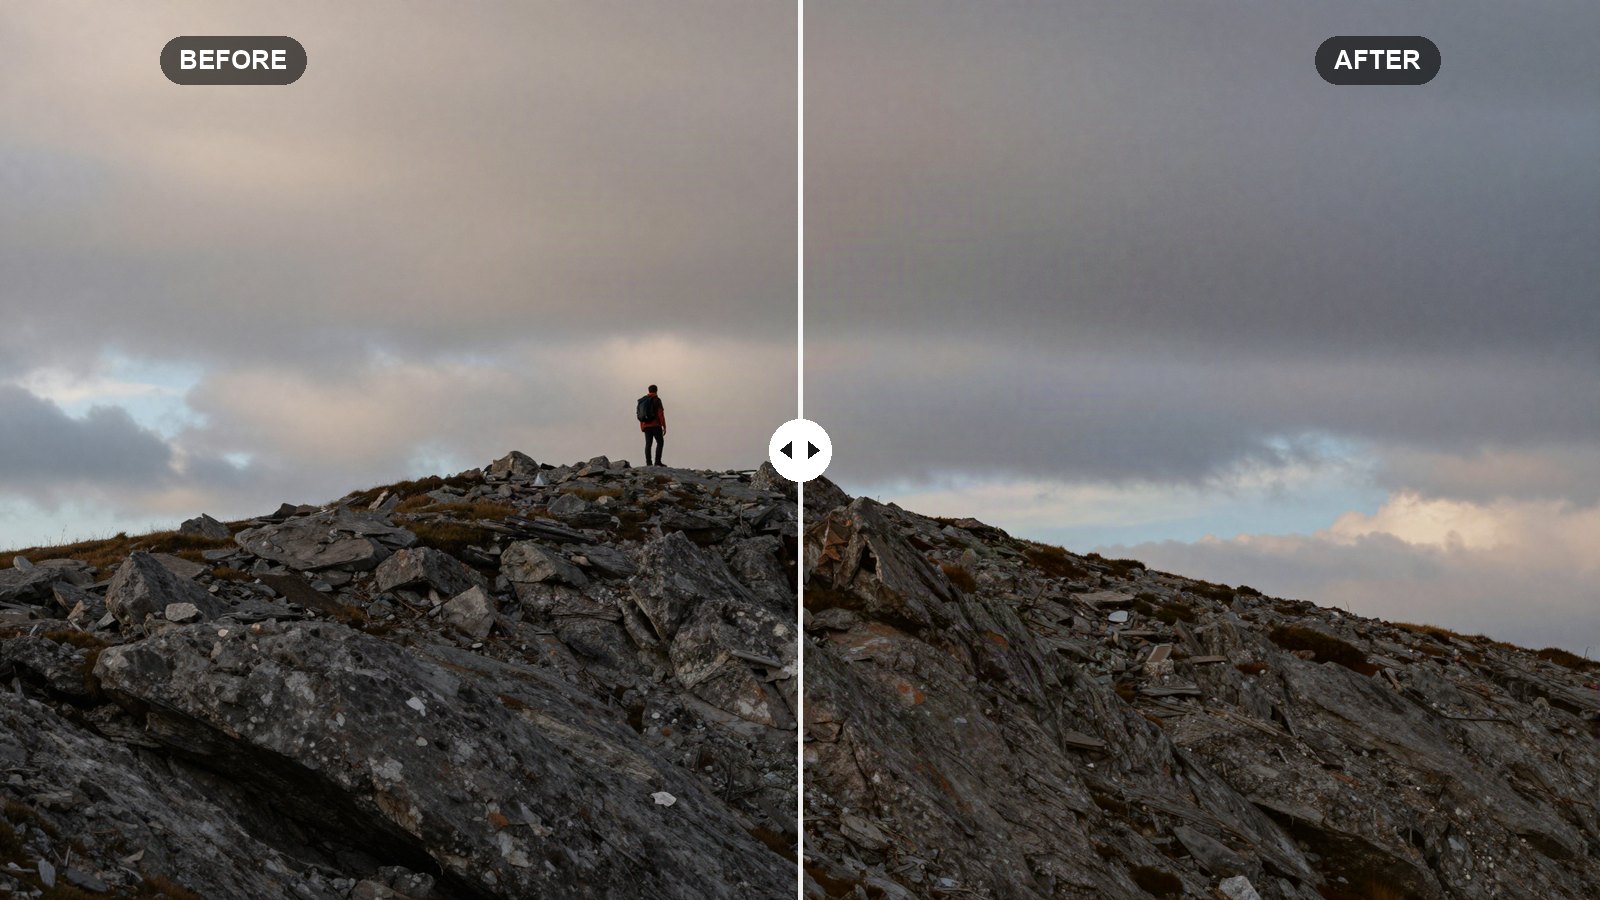
A normal preset changes the whole photo by the same amount. Brighten the subject and you brighten the background too. Adaptive presets work differently: they find the subject, the sky or the person in each photo with AI, build a mask, and apply their adjustments only there. Apply the same preset to ten photos and each one gets its own mask.
This Lightroom adaptive presets guide explains what they are, which groups you will find, how they behave when you stack them with your own presets, and how to save adaptive presets of your own.
Quick answer: Adaptive presets are presets that contain AI masks, such as Select Subject, Select Sky or People. When applied, Lightroom detects that area in each photo and adjusts only it. Apply your own global look first, then add an adaptive preset on top, and fine-tune the masks it creates in the Masking panel.
On this page
What adaptive presets are
Adaptive presets arrived in Lightroom alongside the AI masking tools. A regular preset stores slider values for the whole image. An adaptive preset stores a mask type plus the adjustments inside it. When you apply it, Lightroom runs the detection again on the current photo, so the mask always fits what is actually in the frame.
That makes them useful for edits that used to need manual brushing on every photo: brightening a face, adding drama to a sky, softening a background, or warming up skin.
Where to find them
- Lightroom Classic: in the Develop module, open the Presets panel on the left. Adaptive groups have names that start with Adaptive:, for example Adaptive: Subject and Adaptive: Sky.
- Lightroom desktop: click Presets at the top of the Edit panel. Adaptive groups are listed with Adobe’s built-in presets.
- Lightroom mobile: tap Presets in the bottom toolbar. Adobe’s presets are often under a Premium tab, with the adaptive groups inside.
Adobe adds and renames groups from time to time, so the exact list depends on your version and plan. Some built-in presets need a paid subscription, especially on mobile.
The main adaptive preset groups
| Group | What it masks | Typical use |
|---|---|---|
| Adaptive: Subject | The main subject, detected automatically | Making a person, pet or object stand out with a little more light or color |
| Adaptive: Sky | The sky | Deepening blue skies, adding warmth to sunsets, recovering dull overcast skies |
| Adaptive: Portrait | Parts of people, such as face skin, body skin, hair, eyes, lips and teeth | Smoothing skin, brightening eyes and teeth, enhancing hair |
| Other groups (version dependent) | Varies, for example background blur tied to Lens Blur in recent versions | One-click background softening and similar effects |
Each group contains several variations with descriptive names. Hover over them in Lightroom Classic or Lightroom desktop to preview the result before you click.
Adaptive: Portrait in more detail
Portrait presets rely on People masking, which can detect separate parts of each person. Depending on the preset, it may create several masks at once, for example one for face skin and one for the eyes. If a photo has more than one person, recent versions apply the masks to each detected person, though you should check the Masking panel to make sure nobody was missed. Our guide to editing portraits with presets shows how to fine-tune these masks.
How to apply an adaptive preset
- Do your basic corrections first: white balance, exposure and any crop.
- Apply your main look, either a regular preset or your own edit.
- Open the Presets panel and find an Adaptive group.
- Hover to preview, then click (or tap on mobile) to apply. Lightroom spends a moment detecting the area.
- Adjust the Amount slider that appears for the preset, if your version shows one, to reduce or increase the strength.
- Open the Masking panel to see the masks the preset created and adjust their sliders directly.
Tip: Adaptive presets often look strong at 100. On portraits in particular, we usually drop the Amount to somewhere between 40 and 70 so skin keeps its texture and eyes do not look lit from inside.
How adaptive presets combine with your own presets
This is where most confusion comes from. The rule is simple: a preset only changes the settings saved inside it. Everything else stays as it was.
Global preset first, adaptive preset second
Adobe’s adaptive presets are built mostly from mask adjustments. When you apply one after your own global preset, it adds masks and generally leaves your global sliders alone. That is why we apply the global look first and the adaptive preset second.
Applying a global preset afterward
If you apply a regular preset after an adaptive one, the global sliders change, but the masks usually stay in place. The masks still have their own adjustments, so the combined result can drift. If the subject now looks too bright, adjust the mask rather than the preset.
Stacking two adaptive presets
You can stack a Subject preset and a Sky preset on one photo, because they create separate masks. Applying two presets that target the same area, such as two Sky presets, may add a second mask or replace the first depending on the preset and your version. Check the Masking panel to see what you have, and delete any duplicate.
Your own presets that include masks
When you save a preset with masking included, applying it may add masks next to existing ones rather than replacing them, and the behavior can vary by version. Test new combinations on a virtual copy first (Photo > Create Virtual Copy in Lightroom Classic) so you can compare without losing your edit.
Creating your own adaptive presets
Any preset that includes an AI mask is adaptive. To make one:
- On a representative photo, create a mask with Subject, Sky, Background or People.
- Set the adjustments inside the mask, such as Exposure +0.3 and Texture -10 on a subject.
- Create a new preset. In Lightroom Classic, click the plus icon in the Presets panel and choose Create Preset. In Lightroom desktop and mobile, use the three-dot menu in the Presets panel or editor.
- In the settings list, tick Masking (it may also let you choose which masks to include). Untick White Balance and anything else that should stay per photo.
- Name it clearly, for example “Subject pop +0.3”, and save it to a group.
When you apply this preset to another photo, Lightroom detects the subject or sky again for that image. Masks you drew by hand, like a brush stroke or a radial gradient in a fixed spot, are saved by position and will not move to fit a new subject. Our guide to creating your own Lightroom preset walks through the full save dialog, and the Lightroom masking guide covers each mask type in detail.
Batch editing with adaptive presets
Adaptive presets are well suited to batch work, since each photo gets its own mask. Apply one to many photos at once and Lightroom computes the mask for each. In Lightroom Classic, syncing or copying settings that include AI masks also recomputes the masks for each photo in recent versions. If a mask shows a warning icon saying it needs updating, click Update to recompute it.
AI detection takes time. Applying an adaptive preset to hundreds of photos at once can be slow on older computers, so work in smaller batches.
When adaptive presets struggle
- Busy scenes: Select Subject may pick the wrong subject when several things compete for attention.
- Skies with complex edges: trees, hair and fine branches against the sky can leave halos. Lower the preset Amount or subtract a small brush area.
- Small or distant people: People masking may miss faces that are very small in the frame.
- Heavy creative looks: an adaptive preset on top of a strong global look can push one area too far. Lower the Amount or the mask’s sliders.
Your next edit
Take a photo with a clear subject and sky, apply your usual preset, then add one Adaptive: Subject and one Adaptive: Sky preset at around 50 Amount. Open the Masking panel and look at what each one changed. Then try the Portrait group on a real portrait with our guide to editing portraits with Lightroom presets.
FAQ
What is an adaptive preset in Lightroom?
An adaptive preset is a preset that contains AI masks such as Subject, Sky or People. Instead of changing the whole photo, it detects that area in each image and applies its adjustments only there, so the effect fits every photo.
Can I make my own adaptive presets?
Yes. Create a Subject, Sky, Background or People mask, adjust its sliders, then save a new preset with Masking included. When applied to another photo, Lightroom recomputes the AI mask for that image.
Will an adaptive preset overwrite my other preset?
Usually not. A preset only changes the settings it contains, and adaptive presets are built mostly from masks. Apply your global preset first, then the adaptive one, and check the Masking panel for duplicate masks.
Why are adaptive presets missing in my Lightroom?
They need a recent version of Lightroom, and some built-in presets require a paid plan. Update the app and check the Premium tab on mobile. Group names also change between versions.
Keep reading
Lightroom Remove Tool Guide: Heal, Clone and Generative AI
Content-Aware Remove, Heal, Clone or Generative Remove? Which mode to pick, the settings that matter, and fixing dust fast.
Lightroom Presets vs Profiles: What’s the Difference?
Profiles set how Lightroom renders your photo; presets move the sliders. Here is how they differ and how to use them together.

How to Export, Back Up and Share Lightroom Presets
Where your presets live, how to export them as .xmp files, a simple backup routine, and how to share presets that work on other people's photos.