
A busy background can ruin an otherwise great portrait. Fast lenses solve that in camera by blurring everything behind the subject, but phone cameras and kit zooms at f/5.6 often leave the background sharp and distracting. Lightroom’s Lens Blur adds that soft, out-of-focus look after the fact, using an AI depth map to decide what is near and what is far.
Used gently, it is convincing. Pushed too far, it gives the cut-out look that screams “fake portrait mode”. This Lightroom Lens Blur guide explains each control, how to fix the depth map when Lightroom gets it wrong, and the settings that look natural.
Quick answer: Lens Blur, available in recent versions of Lightroom, blurs the background (or foreground) based on an AI depth map. Turn it on, set Blur Amount, choose a bokeh shape, then set the Focal Range to decide what stays sharp. Use the Focus and Blur refine brushes to fix edges. Start with Blur Amount around 30 to 50.
On this page
Where to find Lens Blur
Lens Blur is one of Lightroom’s newer AI tools, and its location has shifted a little between releases. In recent versions:
- Lightroom Classic: a Lens Blur panel in the Develop module’s right-hand panel stack. Tick Apply to turn it on.
- Lightroom desktop: a Blur or Lens Blur section in the Edit panels, with an Apply toggle.
- Lightroom mobile: in recent versions, a Blur option in the Edit tools. The controls are the same idea, laid out for touch.
If you cannot find it, update the app. When it first appeared it was labeled as an early access feature, and the exact layout may differ slightly from what is described here.
How Lens Blur works
When you turn Lens Blur on, Lightroom analyzes the photo and estimates how far each part of the scene is from the camera. That estimate is the depth map. It then blurs each area according to its distance from the focus point you choose, much like a real lens with a shallow depth of field.
Because the blur is based on depth rather than a simple subject outline, a good result falls off gradually: the ground just behind your subject is only slightly soft, while the trees far behind are very soft. That gradual falloff is what separates a believable result from a cut-out.
Lightroom builds this depth map from the image itself, so it works on RAW files, JPEGs and phone photos alike. Some phone photos also carry depth data from the camera, which Lightroom may use when it is available.
The controls, one by one
Blur Amount
Blur Amount (0 to 100) sets how strong the blur is. Real lenses at f/1.8 to f/2.8 give moderate blur on a portrait taken at normal distance, which in Lightroom often matches 30 to 50. Values near 100 look like a very fast lens shot close up and are much harder to make believable.
Bokeh shape
Bokeh is the look of out-of-focus points of light. Lightroom offers a few styles, such as Circle, Bubble, 5-Blade, Ring and Cat Eye (names may vary by version). Circle is the most neutral and suits most photos. The others mimic specific kinds of vintage or specialty lenses and are best saved for photos with obvious background lights, such as street lights or fairy lights.
Boost
Boost brightens the out-of-focus highlights, making background light sources glow and bloom like they would through real glass. On a night street or a string-light portrait it adds a lot of realism. On a daylight shot with no light sources it does very little.
Focal Range
The Focal Range decides which distances stay sharp. Lightroom shows a depth bar or graph with near distances on one side and far on the other, and a box marking the in-focus zone. You can:
- Let Lightroom pick the subject automatically.
- Click a point on the photo to focus on that distance.
- Drag on the photo to set a focus area.
- Resize the in-focus box on the depth bar to make the sharp zone deeper or shallower.
A deeper in-focus zone looks more like a smaller aperture. If your subject’s shoulders or hands go soft while the face stays sharp, widen the zone.
Visualize Depth
Turn on Visualize Depth to see the depth map as color over the photo, with near and far areas shown in different colors. It is the fastest way to spot errors, like a patch of background Lightroom thinks is near, or a raised hand it thinks is far.
Quick tip: Check hair, glasses and fingers at 100% zoom before you finish. These are where depth maps most often go wrong, and a strand of hair blurred into the background is the first thing a viewer notices.
Refining the depth map
The Refine section gives you two brushes:
- Focus brush: paint over areas that should be sharp but are getting blurred, such as the edge of a shoulder or a hand held forward.
- Blur brush: paint over areas that should be blurred but are staying sharp, such as a gap between arm and body showing the background.
Each brush has its own size, feather and amount controls, much like a mask brush. Work at a zoom level where you can see edges clearly, and use small, soft strokes. The goal is to correct mistakes, not repaint the whole map.
A natural-looking Lens Blur, step by step
- Finish your main edit first. Exposure, white balance and color should be close to final, because Boost and bokeh react to the brightness of the background.
- Turn on Lens Blur and wait a moment for the depth map to compute.
- Set Blur Amount to about 40 and keep the Circle bokeh.
- Set focus on the subject’s eyes or let Lightroom choose the subject, then widen the in-focus zone until the whole subject is sharp.
- Turn on Visualize Depth and look for obvious mistakes.
- Refine edges with the Focus and Blur brushes, especially around hair and hands.
- Back off the Amount. Compare before and after, then lower the blur by 10 points. It almost always looks more believable.
Photos that work, and photos that do not
| Works well | Struggles |
|---|---|
| Portraits with clear distance to the background | Subject standing against a wall |
| Product or food shots on a table | Glass, water and transparent objects |
| Street scenes with lights behind the subject | Fine, flyaway hair against a busy background |
| Pets, flowers and close-up details | Wide landscapes where everything should be sharp |
If the subject is touching the background, there is no real depth to blur, and heavy Lens Blur will look fake. In that case, a gentle background mask with lower Clarity, Texture and Exposure often looks better. Our masking guide covers Select Background and how to soften it.
Lens Blur and presets
Lens Blur settings are tied to each photo’s depth map, so treat them as a final, per-photo step rather than something to bake into a look. Apply your preset first, then add Lens Blur. If you do save Lens Blur in a preset, Lightroom still has to compute a fresh depth map for every photo, and you will usually need to adjust focus anyway.
Lens Blur also pairs well with a gentle vignette and slightly lower background exposure, which draws the eye to the subject the same way a real shallow-focus portrait does. For a full portrait workflow, see our guide to editing portraits with Lightroom presets.
Performance and exporting
Computing the depth map and rendering the blur takes processing power, especially on large RAW files. On older computers the preview can lag while you drag sliders. Give it a second to catch up before judging the result.
Exports include the blur like any other edit. Because the effect is non-destructive, you can come back later, change the focus point or turn it off entirely without losing anything.
Your next edit
Try Lens Blur on three photos: a portrait with distance behind the subject, a close-up of food or a flower, and a night shot with lights in the background. Keep Blur Amount under 50 on all three and see which one benefits most. Then tidy up the frame and composition with our crop and straighten guide.
FAQ
Does Lightroom Lens Blur work on JPEG and phone photos?
Yes. Lens Blur builds its own AI depth map from the image, so it works on RAW, JPEG and phone photos. Results depend on how clearly the subject separates from the background.
Why can’t I find Lens Blur in Lightroom?
It is only in recent versions of Lightroom Classic, Lightroom desktop and Lightroom mobile. Update the app, then look for a Lens Blur panel in Classic or a Blur option in the edit tools on desktop and mobile.
What Blur Amount looks natural?
For most portraits, 30 to 50 looks like a real fast lens. Go higher only when there is a lot of distance between subject and background, and always check edges at 100% zoom.
How do I fix hair that gets blurred by Lens Blur?
Open the Refine section and paint over the hair with the Focus brush using a small, soft brush. Turning on Visualize Depth first shows exactly where Lightroom misjudged the distance.
Keep reading
How to Create Your Own Lightroom Preset (Step by Step)
Save your own Lightroom presets, choose the right settings to include, and keep a growing collection organized and backed up.
How to Export, Back Up and Share Lightroom Presets
Where your presets live, how to export them as .xmp files, a simple backup routine, and how to share presets that work on other people's photos.
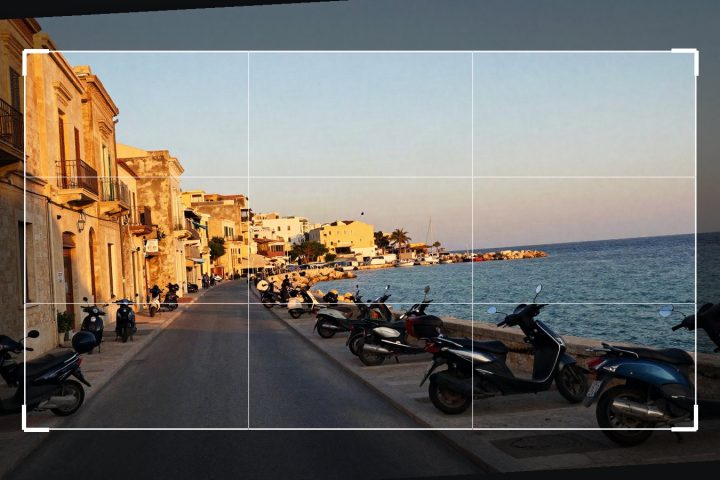
Lightroom Crop and Straighten Guide: Ratios, Upright, Guided
Level horizons, pick the right aspect ratio and fix leaning buildings with Upright and Guided Upright in Lightroom.